Sunday, December 29, 2013

Home For The Holidays - Feast of The Seven Fishes, 2013!


Smoked Salmon with Lemon Creme Fraiche on Chips
(Thanks, Nina, for my beautiful plates!)
Photo: NK
Wow, Holidays, you really know how to exhaust a girl. But you are so worth it. I may be coming to you just a bit later than usual with the holiday recap of our annual Feast of The Seven Fishes Christmas Eve Meal, but I'm happy to say that our third year of hosting was a success! 

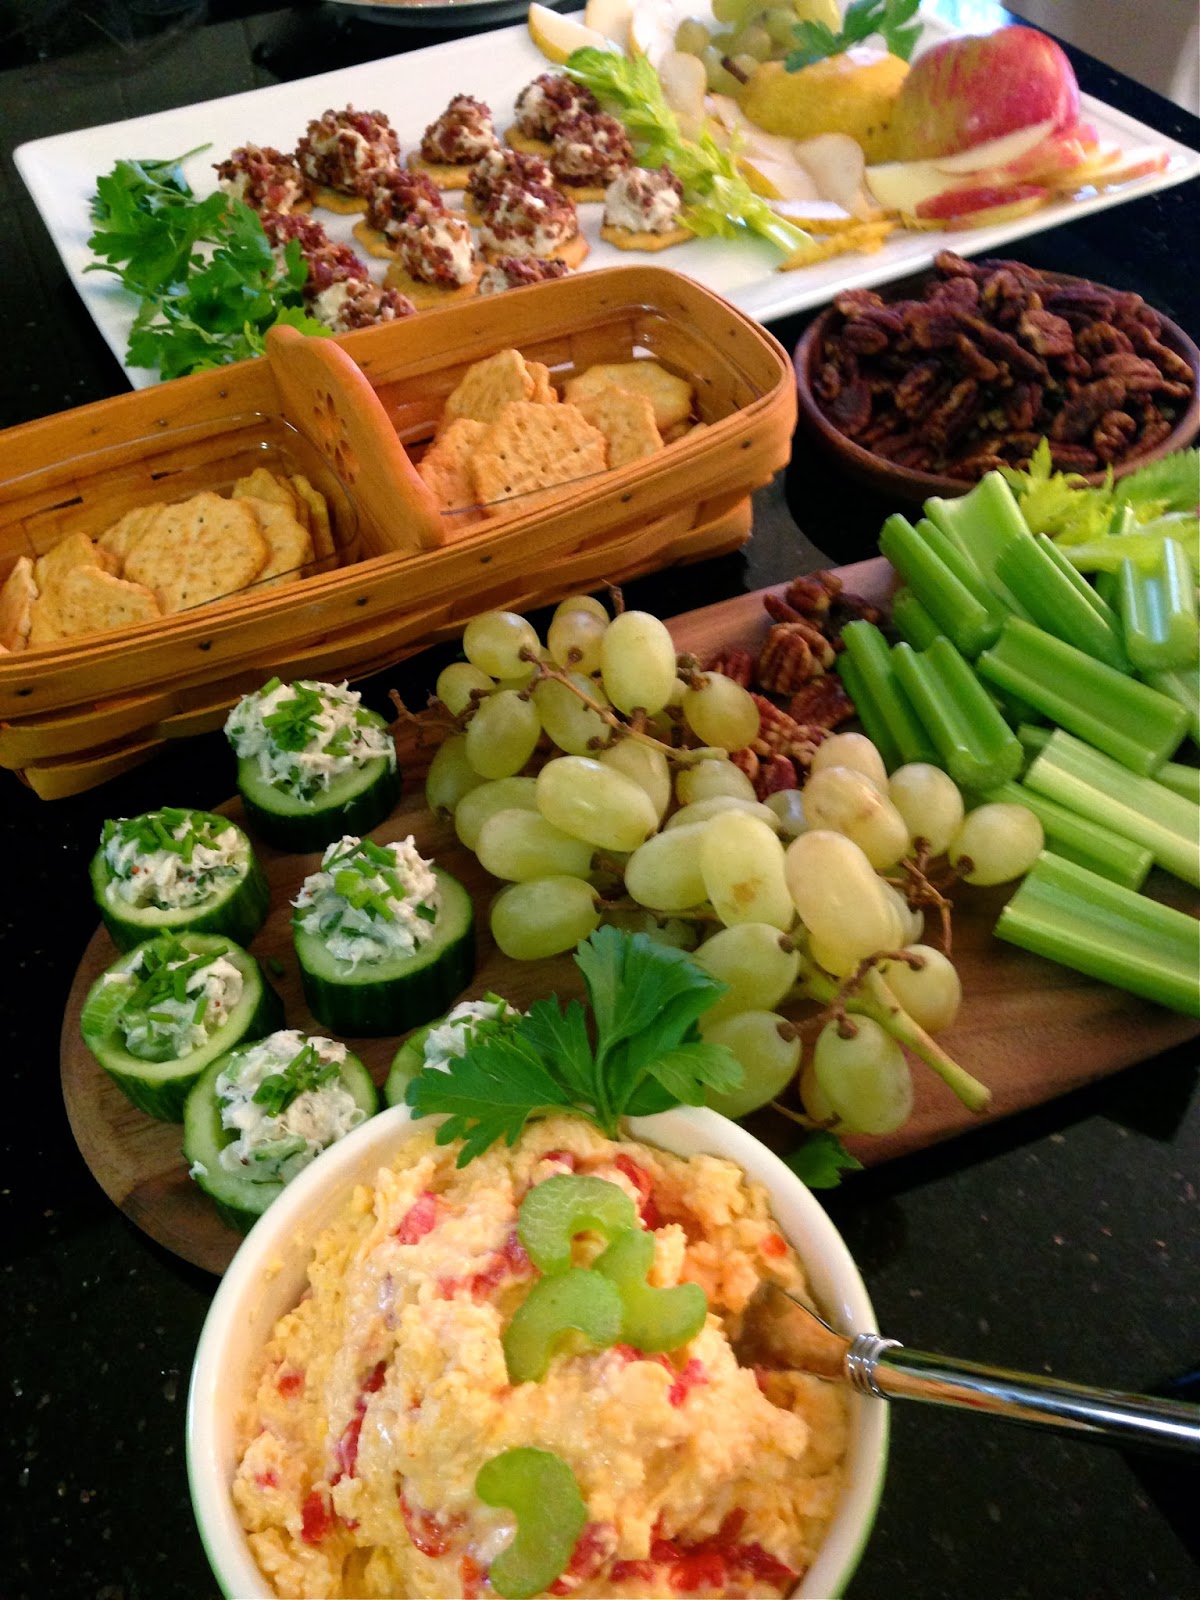
Many dishes from last year's menu made a repeat showing, but I also made sure to add on a few new recipes for variety's sake. In fact, we increased our number of courses overall and were very proud to serve a total of eight dishes (counting hors d'oeuvres) and a whopping nine kinds of fish! Definitely a personal best for this household! 

To kick off the evening, we served up Smoked Salmon with Lemon Creme Fraiche Canapés. We made a slight change to last year's recipe by spiking the creme fraiche with about a teaspoon of lemon zest (to three tablespoons of creme) and serving the salmon mixture on a kettle-cooked potato chips! I just love hors d'oeuvres on chips, and they are much more cost effective than using blini as a base. 

Before I go on, here's our whole menu:


Feast of the Seven Fishes - 2013
Smoked Salmon Canapes on Chips (recipe HERE)
Crostini with Roasted Red Peppers & Tonnato Sauce (see below)
Individual Lump Crab Cocktails (recipe HERE)

Baccala Salad (see below)
Calamari Salad with Citrus Flavors (see below)
Zuppa di Vongole (Clams) over Savory Crouton (recipe HERE)
Shrimp & Lobster Fra Diavolo over Fettucine (recipe HERE)
Rao's Lemon Sole (recipe HERE)

Assorted Desserts Courtesy of our Guests! (scroll for photos)

Individual Lump Crab Cocktails, Photo: NK
For our next hors d'oeuvre bite, we served crostini that had been lightly brushed with a classic Italian sauce called Tonnato, before being topped with slices of roasted pepper. A personal favorite of mine, Tonnato is  a tuna-based sauce most traditionally served with thinly sliced, chilled veal. The sauce is native to the Piedmont region in Italy.  Forgetting himself, my husband cutely refers to it as "tornado." As in: "Are you making the tornado appetizer?" He sure is good for comic relief. I hope you enjoy this festive, easy, and very Italian nibble, Crostini With Roasted Red Peppers & Tonnato Sauce:


Crostini with Roasted Red Peppers & Tonnato Sauce, Photo: NK  

Crostini With Roasted Red Peppers & Tonnato Sauce 
Adapted from Food & Wine and inspired by Epicurious
Serves 8, 2 pieces per guest
Make Ahead: Tonnato sauce can be made up to 2 days ahead and stored in the fridge. Assemble crostini about an hour or less before serving. 

Ingredients:

1/4 Cup Olive Oil based Mayonnaise
3 Tablespoons Olive Oil
3 Tablespoons Lemon Juice
One 6-Ounce Jar Italian Tuna packed in Olive Oil
3 teaspoons Capers (divided), drained and well rinsed
2 Tablespoons Water
6 Anchovy fillets
1 Jar Roasted Red Peppers, drained and patted dry, sliced into 1/2 inch strips
1 Crusty French Baguette, sliced into 16 thin slices, brushed with Olive Oil and toasted 
1/2 Cup finely chopped Italian Parsley

Method: 
1. Blend 2 teaspoons capers with Mayonnaise, Olive Oil, Lemon Juice, Tuna, and Water until smooth and silky. You can prepare up to this step as much as 2 days in advance. Keep refrigerated. 

2. Spread about a teaspoon of Tonnato Sauce on each slice of bread. Now top each toast with 2-3 slices of Red Pepper. Sprinkle with Capers and ample Parsley. Enjoy!

NEXT UP: 
This Sicilian style calamari salad is understated, clean and delicious. A dash of orange flavor makes it interesting and bright. Cooking the calamari just right is the key to nailing this recipe - and steaming the fish is a great way to achieve the perfect texture.  It'll become an instant classic at your holiday table, but is simple enough for everyday. 


Calamari Salad With Citrus Flavors, Photo: NK

Calamari Salad With Citrus Flavors
Lightly adapted from Lidia Bastianich
Serves 6 as a light appetizer
Make Ahead: This salad will keep nicely in the fridge for 24 hours. Bring to room temp before serving, or served chilled if you prefer. 

Ingredients:
1.5 - 2 Pounds Cleaned Calamari (medium-large size, tubes and tentacles)
1 Lemon
3 Dried Bay Leaves
1.5 Tablespoons Lemon Juice 
1 Orange, zested (for about a Tablespoon of zest)
3/4 teaspoon Kosher Salt or Sea Salt, divided
3 Tablespoons Extra Virgin Olive Oil
1/4 teaspoon Crushed Red Pepper or more to taste
3 Tablespoons Italian Parsley, chopped

Method: 
1. Set a large pot with a few inches of water at the bottom on the stove, enough you'll be able to position a colander inside of the pot without it touching the water. Shave all the yellow zest off the lemon using a paring knife. Avoid the white pith. Add the lemon rinds and bay leaves to the water and bring it to a simmer, covered, for 30 minutes. This will infuse the water with their aromas. 

2. While the water simmers, rinse Calamari tubes and tentacles well. Slice the tubes into 1/3 inch rings. For the larger tubes, you can fold them over lengthwise in order to slice them more easily. Trim any extra-long tentacles and discard.

3. Once water has simmered for a half hour, place the colander atop the pot and add the calamari. Cover the pot, and allow to steam for 2 minutes. Add two pinches of salt to the calamari and toss in the colander. Repeat this process about 3 times for a total of 8-10 minutes steaming time. Note:The 8 minutes is broken into 2 minute intervals where you season and toss the squid. You'll know the squid is done when it is tender but slightly springy to the bite. 

4. Remove the colander to a sink and allow the calamari to drain and cool a bit for about 5 minutes. Place calamari in a bowl and toss with crushed red pepper, olive oil, lemon juice, grated orange zest, and parsley. Taste for seasoning and add any remaining salt if needed. Serve warm or at room temperature. Enjoy!!   


Baccala Salad. Photo: NK

And now, for what ended up being the sleeper hit of our Christmas Eve feast, our version of Baccala Salad. But first, a confession: for years, I've felt semi-fradulent by not including de rigueur Baccala in our Italian fish menu. Baccala is dried salt cod that requires soaking and reconstituting in water before it can be used in food preparations. Truth is, I've never liked eating salt cod in fillet form, even though, interestingly, plain old fresh cod is probably one of my favorite fish. But who am I to impugn a food that generations of Italian grandmas have revered? So, with the best of intentions, I tried my hand at Baccala (a day in advance of my party, just in case the worst happened). 

For the three days preceding, I'd dutifully soaked the cod, and changed the water twice per day as directed. Still, when I finally boiled it up, I found it fishy and not that tender. Definitely not something I was comfortable serving. Granted, I probably did something massively wrong or overcooked the fish, but the show needed to go on, and I was determined to complete my cod mission. One fillet of fresh cod later and I was on my way. The result was delicious. Besides, we here at Neurotic Kitchen don't spend three days preparing anything, so this fresh cod solution was really much more our speed. With just six minutes in poaching liquid, what emerged was a stunning white cod fillet that was plump and ready to be mixed up with some mouthwatering hot cherry peppers, olives, and capers. I am drooling again as I write this. Enjoy! 

Baccala Salad
Adapted from the Rao's Cookbook
Serves 6 as a light appetizer course 
Make Ahead: You can prepare this up to 6 or 7 hours in advance. Store in the fridge and serve at room temperature

Ingredients: 
2 - 8 to 10 Ounce Fillets of  Fresh Icelandic Cod
1/2 Cup Olive Oil
2 Garlic Cloves, crushed
1/4 Cup Lemon Juice
1/2 Cup Hot Cherry Peppers, sliced
1/2 Cup Sweet Vinegar Peppers, sliced
1/2 Cup pitted Gaeta Olives, sliced in half
2 Tablespoons Capers, rinsed
3 Tablespoons Italian Parsley, chopped
Salt and Pepper to taste

Method:
1. Place cod fillets in a deep saute pan and fill the pan with water until fillets are just submerged. Bring the pan to a steady boil and turn off the heat immediately. Cover and allow the fish to poach for 6 minutes untouched. It should be opaque and flake easily when finished. Carefully remove fillets to a flat surface. Check for bones and skin and remove any that remain. Gently crumble or slice the fish into bite-sized cubes. Allow fish to cool fully and place it in a bowl. 

2. In a small pan, heat the oil and saute the garlic cloves in for 3 minutes over low heat. Cool the oil. 

3. Pour the oil and garlic over the cod and add lemon juice, the peppers, olives, capers, and parsley. Stir gently and add salt and pepper to taste. Place on a platter and serve at room temperature. 

Enjoy! 

Before I leave you, I wanted to share some of the great desserts our guests brought to Christmas Eve, and the next day to Christmas dinner at my mother-in-law's house. To say we ate well over these two days would be an understatement.  I hope you enjoyed this holiday recap and that you are having a festive season with your loved ones. See you in the New Year! 


My Mom's delicious Coconut Cupcakes (Ina Garten's Recipe)
Photo: NK
My Mom's beautiful Chocolate Layer Cake (Ina Garten's Recipe) plus holly from our backyard, Photo: NK

My Sister-in-Law's gorgeous and delectable Chocolate Berry Wreath Cake and
 Mom-in-Law's very yummy Key Lime Pie (Cook's Illustrated Recipe) Photo: NK

Wednesday, December 18, 2013

Practice Makes Perfect - Shrimp & Lobster Fra Diavolo

You may have heard, I'm a touch bit neurotic. This will come as no surprise to the poor folks (friends, family, workmates, and strangers) who've endured my constant yammering about the fact that, for the third year running, I'm hosting our family's annual Christmas Eve meal - a traditional Italian multi-course  Feast of the Seven Fishes


Rock Shrimp & Lobster Fra Diavolo over Fettucine, Photo: NK

I yammer when I'm nervous. 

Even the most practiced cooks can come down with a case of stage fright around the holidays. I am no different. I like everything to come out perfectly seasoned and satisfying, and I often end up driving myself a bit bonkers in the process. But that's the good thing about this blog - I drive myself nuts so you don't have to! Our recipes are all tried and true, and where possible, I've added tips and tricks to increase the ease of each dish as well as minimize any potential for error.


Still, the number one way I keep my culinary cool is to try and practice new dishes in advance. There's nothing like the peace of mind that comes from having made a dish before. It's also true that the more you make it, the easier it gets until one day, it's become second nature. That's just what we're doing today as we try our hand at Rock Shrimp & Lobster Fra Diavolo over Fettucine. It's a lot like last year's Christmas Eve dish of Shrimp Arrabiata. I just happen to find pasta and spicy tomato sauce to be the perfect vehicle for seafood.

Now, a few words for Lidia Bastianich on her recipe that we've adapted today:

The amount of peperoncino you use to obtain the “Fra Diavolo,” or “Brother Devil”, is to your liking. Fra Diavolo sauce, originally used with lobster chunks still in the shell, is a creation of Italian immigrants in New York City at the turn of the twentieth century.

The Results:
Shrimp and Lobster Fra Diavolo is, as I predicted, pretty easy to make. After gobbling it all up ourselves last night, the husband and I feel pretty confident that it will be well received on Christmas Eve. I've included my "make-ahead" strategy below so you too can make this dish company-ready, although I think it could certainly be prepared fully and fridged for 5 or 6 hours in advance (just reheat low and slow so the fish doesn't get tough). Start to finish, it only takes about 35 minutes, so it's a great addition to your easy to execute repertoire. Stay tuned for the full play-by-play of our Feast of the Seven Fishes meal next week. Enjoy!


Shrimp & Lobster Fra Diavolo
Adapted from Lidia Bastianich
Serves 8 as an Appetizer or 6 as a Main Course

Ingredients: 
San Marzano Tomatoes, Photo: NK
1.5 Lbs Long Pasta of your choice - we used Fettucine
1/4 Cup Extra Virgin Olive Oil
6 large cloves of Garlic, peeled and crushed 
5 sprigs of Fresh Thyme
1 teaspoon Sea Salt, divided

1.5 Lbs Rock Shrimp OR 1 Lb Rock Shrimp & 1 8-Oz Lobster Tail, cut in bite-sized chunks

1.5 cups diced Celery (inner stalks)
1/2 teaspoon Crushed Red Pepper or to taste
1 - 28 Oz Can Whole Peeled canned San Marzano Tomatoes 
1 Cup Water
1/4 Cup Capers, drained
1/4 Cup Italian Parsley, chopped 
Searing the Shrimp, Photo: NK

Method:
1. In a very large skillet over medium-high heat, add the olive oil and garlic cloves. As the garlic begins to sizzle, add the sprigs of thyme 

2. Now add shrimp (and the lobster if using). Season the seafood with a 1/2 teaspoon of salt and toss it around the pan for about 2 minutes until shrimp and lobster are opaque and somewhat firm. Using a slotted spoon, remove shrimp and lobster to a plate and set aside.

3. Add the celery to the skillet. Cook until wilted, about 3 minutes, stirring occasionally. Add the crushed red pepper and allow to toast about 1 minute. Pour in all the contents from the canned tomatoes plus about 3/4 cup water. Using a potato masher, crush the whole tomatoes a bit right in the pan. Season with another 1/2 teaspoon of salt. 

 
4. Now is the time to start some salted pasta water to boil. Once boiling, prepare pasta according to package instructions. 
Preparing the Sauce, Photo: NK

5. Bring the sauce to a simmer and allow to cook until the celery becomes tender and the sauce thickens - about 15 minutes or a bit more should do it. 
Now, stir in the capers and return the sauce to a boil. Add the shrimp (and lobster, if using) back into the skillet. Warm through, stirring, for another 2 minutes or more until fully cooked. Stir in the parsley. 

6. Plate each portion of pasta and top with a scoop of the sauce. Serve and enjoy!

Make Ahead Strategy:
To serve this meal for guests, I recommend preparing the recipe as above, all the way through, but skipping step two (where you cook the fish). About 20 minutes before you'd like to serve the meal, set a pot of water to boil for the pasta and put a low flame under your already prepared sauce. About 5 minutes before your pasta is finished cooking, cook the seafood in a separate saute pan with hot oil, tossing until cooked through. Add the fish to the pasta sauce, plate, serve, enjoy!


Tuesday, December 10, 2013

Test Kitchen Tuesday - Ina Garten's Bay Scallop Gratin

The first snowflakes of the season fell today and now BAM, we're in a deep freeze.  Sure, the winter's gonna be long, but there is reason to rejoice; warm, cozy dishes and comforting foods are in our future. Bathing suits, on the other hand, are many months away so we may, just may, use a little butter. Could you tell that was an understatement?

Heavenly Bay Scallops Gratin, Photo: NK 
Tonight's seemingly luxurious yet incredibly easy appetizer, Bay Scallops Gratin, comes to us from fellow butter hedonist and goddess of simplified domesticity, Ina Garten. It is just the thing if you're looking for an elegant seafood starter for your next party, or even just for a special night in. Here in the New York area, Long Island Bay Scallops are in season and as sweet as ever. Add some breadcrumbs (panko, in this case), parsley, lemon and of course, a lot of garlic, and something wonderful will emerge from your oven. 

As always, here are some pointers below.

Tips: 

If you don't have small, oval gratins in which to cook these individual portions, use any other oven-safe, earthenware bowl of a similar size. 

I've posted Ina's recipe exactly as it appears on her site, The Barefoot Contessa. In making this dish myself, I did make one or two slight changes, you guessed it, to increase ease and convenience (two of my favorite words). 

First, I subbed the Pernod out for Sambuca, which I purchased in a mini-airplane bottle size (since the recipe only calls for a few tablespoons of it). The result was still delicious.
Preparing the Gratins, Photo: NK

Secondly, I omitted the chopped Prosciutto. I'd just spent a pretty penny on those bay scallops, and didn't feel like dipping into my pockets again. Also, I reasoned that this recipe would be rich and lovely with the butter and breadcrumbs alone. I don't doubt Ina, though. I'll try it with prosciutto one of these days. Note: You may have to add a bit of salt at the end if you don't use naturally salty prosciutto. I found it salty enough as is, however.

Finally, in step one of the recipe where you are called to blend the breadcrumbs with the softened butter using a mixer, I simply stirred everything together slowly, by hand. Using Butter that's fully softened and cut into small pieces will make achieving this easier. And you can skip having to clean your electric mixer! I'm lazy, what can I say?

OK! Let's cook. Thank you, Contessa, for yet another winner. 
Bon appétit!   

Bay Scallops Gratin
Recipe by Ina Garten, from her Back To Basics cookbook Serves 6

Ingredients:
6 tablespoons unsalted butter, at room temperature 
6 large garlic cloves, minced 
2 medium shallot, minced 
2 ounce thinly sliced prosciutto di Parma, minced 
4 tablespoons minced fresh parsley, plus extra for garnish 
2 tablespoon freshly squeezed lemon juice 
2 tablespoon Pernod 
2 teaspoon kosher salt 
1 teaspoon freshly ground black pepper 
6 tablespoons good olive oil 
1/2 cup panko (Japanese dried bread flakes) 
6 tablespoons dry white wine 
2 pound fresh bay scallops 
Lemon, for garnish 

Method: 
Preheat the oven to 425 degrees. Place 3 (6-inch round) gratin dishes on a sheet pan. 

To make the topping, place the butter in the bowl of an electric mixer fitted with the paddle attachment (you can also use a hand mixer). With the mixer on low speed, add the garlic, shallot, prosciutto, parsley, lemon juice, Pernod, salt, and pepper and mix until combined. With the mixer still on low, add the olive oil slowly as though making mayonnaise, until combined. Fold the panko in with a rubber spatula and set aside. 

Preheat the broiler, if it’s separate from your oven. 

Place 1 tablespoon of the wine in the bottom of each gratin dish. With a small sharp knife, remove the white muscle and membrane from the side of each scallop and discard. Pat the scallops dry with paper towels and distribute them among the 3 dishes. Spoon the garlic butter evenly over the top of the scallops. Bake for 10 to 12 minutes, until the topping is golden and sizzling and the scallops are barely done. If you want the top crustier, place the dishes under the broiler for 2 minutes, until browned. Finish with a squeeze of fresh lemon juice and a sprinkling of chopped parsley and serve immediately with crusty French bread.

Sunday, December 1, 2013

All-American Starters - Southern Cheese Board: Pimiento Cheese, Candied Bourbon Pecans & Bacon Cheese Truffles

Hope y'all had a great Thanksgiving! Could you hear this Yankee saying that in my best Southern accent? We sure did, and as usual, we were treated to a great meal from start to finish. It's become custom for me to be in charge of holiday hors d'oeuvres, and this year was no different. It will also surprise nobody that I chose to present a cheese plate (I just love cheese), or that said cheese plate would be themed. What can I say, I like continuity. It's kind of how I roll

I'm still feeling inspired by our family's recent South Carolina culinary adventure, so the foods of the South have been on my mind. With Thanksgiving being the quintessential American holiday, it just made sense to showcase some treats inspired by the American South.   

Southern Cheese Board with Pimiento Cheese, Bacon Cheese Truffles, and Candied Bourbon Pecans,
+ Crab Salad on Cucumber Chips, Photo: NK

From classic Pimiento Cheese, to Candied Bourbon Pecans, to Bacon Covered Gorgonzola Truffles, I think I succeeded in hitting each sweet, savory and salty note that I'd aimed for. Was it a little rich? Oh yes, but each component to this year's Southern Cheese Selection can stand nicely on its own if you prefer. Feel free to pick and choose whether to make all the elements or just one or two. Side Note: sinfully delicious sweet and salty bourbon pecans make a great homemade holiday gift!

Elements For The Perfect Southern Cheese Plate:
Pimiento Cheese (Recipe Below) - served with celery and Ritz Crackers for dipping.
Sweet and Salty Candied Bourbon Pecans (Recipe Below) - scattered about for a sweet, crunchy counterpoint.
Gorgonzola Bacon Truffles* (Click HERE for Recipe) Gorgonzola isn't really southern but bacon sure is.
Assorted Fruits and Garnishes -Tart green grapes, super ripe Pears (which go wonderfully with the bacon truffles), apples and apple slices, celery tops (for decoration), and flat-leaf parsley for color.

Need an extra hors d'oeuvre? Try our perennial favorite, Crab Salad with Cucumber Cups (pictured above, recipe HERE).  


Gorgonzola Bacon Truffles, Photo: NK

Note* I attempted to adapt the Gorgonzola Bacon Truffle recipe using low-fat cream cheese and gorgonzola dolce which was not pre-packed/crumbled. It didn't work too well! My truffles weren't firm, even after chilling. The result was still delicious, so I decided to serve them on a cracker so that guests wouldn't have to attempt scrape them off the plate. Part of cooking is thinking on your feet!      

In short, I'd recommend following Southern Living's recipe to the letter, as I suspect my ingredient choices did not offer a dense enough in consistency to begin with. I also recommend chilling the mixture in the freezer before rolling out the truffle balls. 


Sweet and Salty Candied Bourbon Pecans
Lightly Adapted from Justapinch.com/Recipe by Pat Duran
Candied Bourbon Pecans, Photo: NK
Yield: 4 Cups

Ingredients:
4 Cups Pecan Halves (we used Diamond brand)
1 stick Salted Butter (not margarine)
1 1/4 Cup Dark Brown Sugar
1 teaspoon high quality Cinnamon
1 teaspoon Salt
1/4 Cup Bourbon
1/4 - 1/2 teaspoon Cayenne Pepper (depending on how spicy you prefer)

Method:

1. Preheat the oven to 350. Lay pecans on a rimmed baking sheet and bake for 10 minutes  until fragrant. Move toasted pecans to a bowl and set aside.

2. In a large, heavy skillet (cast iron if possible), melt the butter over medium heat, stirring it as it melts or else it will brown. Add toasted pecans and stir to coat well. Next, add the brown sugar, salt and cinnamon. Turn down the flame just a touch and continue to stir constantly for a full 10 minutes. Do not leave the nuts unattended. The sugar will gradually liquify and candy the nuts.

3. Now, add the bourbon slowly and carefully as it could flame, then stir to combine for about 2 minutes. Sprinkle nuts with optional Cayenne if you choose. Remove skillet from the heat and pour pecans onto a baking sheet that has been lined with parchment paper. Spread them into a single layer as best you can. Allow to cool for 20 minutes and break up any clumps. Cool completely before serving or packaging.

NOTE: Pecans can be stored in an airtight container at room temperature for up to 1 week. 

Next up, the star of the show, everyone's favorite - Pimiento Cheese. For the uninitiated, pimiento cheese is a delightful blend of cheddar cheese, mayonnaise, and diced pimiento peppers. There are many variations from here, but I chose to adapt Andrew Knowlton's grandma's very straightforward recipe. A dash of worcestershire and some Tabasco made it my own. The result was a vaguely spicy but not overpowering and of course, it was gobbled up in no time flat. On the chance you have any leftover, toss it into macaroni for a quick mac 'n cheese, or spread on some toast for an improvised grilled cheese. The possibilities are endless

Classic Pimiento Cheese
Something for everyone, Photo: NK
Lightly Adapted from Andrew Knowlton/Bon Appetit
Yield - 3 Cups (enough for about 10 people) 

Ingredients: 
1 1/2 Cups (packed) Sharp Yellow Cheddar, finely grated
1 1/2 Cups (packed) White Cheddar, finely grated
1 Cup Low Fat Mayonnaise
1/3 Cup jarred Pimiento, drained and chopped
1/4 teaspoon Cayenne Pepper
1/2 teaspoon Worcestershire Sauce
2 dashes Tabasco Sauce (optional)
Salt and Pepper
Celery Sticks or Ritz Crackers to serve

Method: 
Mash all ingredients together and stir very well. Taste for seasonings. Add a few dashes of pepper and add  salt only if needed - the worcestershire should provide enough salinity. Chill until cold for at least 2 hours or up to 3 days. Serve with celery sticks and/or Ritz crackers. 

Bonus - check out my mom's beautifully presented spinach dip served in a cabbage! She uses the classic Knorr Recipe (don't skip the water chestnuts!). It's one of my favorites! 
Enjoy, and i hope everyone had a great holiday!


Knorr Classic Spinach Dip, Photo: NK

Sunday, November 24, 2013

The Italian Family Table - Antipasti For a Crowd

Tutti a tavola a mangiare! 
This is the directive that Lidia Bastianich, one of my favorite Italian cooks, gives when her tempting dishes are ready. It means, "everyone to the table to eat!" 
I love these words because they evoke, at least for me, a very specific emotion. 
JOY. 
When I hear them, I know it's time to enjoy family, togetherness, community, and most of all, great food.  
Antipasti, Photo: NK


This past Saturday, I was lucky enough to swing a get-together with my brother and sister and their families. It isn't often that our three busy schedules coincide, so I was especially delighted to be able to catch up with them before the holiday season made things even more complicated. My mom was kind enough to offer her home as the venue. She's also a great cook and graciously volunteered to make her delicious sauce and meatballs to serve as the main course (we were a total of 8 people + a baby). All I would need to do was set out some hors d'oeuvres and whipped up a salad. Our guests brought dessert, so the whole thing came together easily. The larger the crowd, the simpler I like to keep it. 

Fennel (Left), Cheeses in counter clockwise order from the bottom left: Truffle Pecorino, Taleggio, Provolone, & Spreadable Goat Cheese Photo: NK

One of my favorite ways to get everyone to a table is to lay out a varied, vibrant spread of meats, cheeses, and fruits as a way to kick off a meal. When guests fill up a bit before the actual dinner, you need only serve one main course and maybe a salad, and they'll be more than satisfied. Focusing on the pre-dinner foods is a great way to front-load the work that goes into any large gathering, as well as to add variety, leaving you plenty of time to enjoy your family or guests. 

As for the pre-dinner spread, I have a very particular plating aesthetic:

Abundance. 
+
plenty of color. 

It should be noted that when I am creating a multi-course sit-down meal, my strategy is very different; I'll instead, keep pre-dinner bites very light (or make much fewer of them) so as to leave my guests able to enjoy all the subsequent dishes. 

Antipasti is the plural of the Italian word, Antipasto, which means, before the meal
For me, assorted antipasti is the best way to start a large gathering because a lovely cold appetizer spread nearly always requires little to no cooking. It's more about using great products and assembling them beautifully. Because I put a high priority "presentation," or how food looks, antipasti platters also allow me to flex my creative plating muscles - one of my most favorite things to do! 
How'd it turn out? I'm still pretty giddy even a day later. It's always so wonderful to spend time with my siblings, niece and two nephews. I don't get to see them nearly as much as I'd like. My eldest niece and nephew are growing up into remarkable young people - but so fast! The baby of our family is only year and a half old. He's a real ham, and his adorable antics kept us laughing for hours. 

There really is nothing like sharing a meal with family. 

With Thanksgiving and the holiday season right around the corner, what better time to share these simple antipasti ideas with you? The selection offered below is certainly very typical, but you should feel free to add your own ideas. I'm aiming only to provide a recap in order to lend a little inspiration at a time of the year when cooking for a crowd can seem incredibly daunting. I hope you enjoy this Cold Antipasti How-To, and that you have plenty of great holiday memories on their way to you!

First, before we start, 
A general Rule for portioning cheese and meats: 
1 ounce of per person means everyone will get a taste. 
2 ounces per person will be an ample serving. 
1.5 ounces per guest is probably perfect. 


Antipasti for 8

Platter 1 - Salumi - aka The Salted, Cured Meats
Prosciutto, very thinly sliced. Imported is ideal, or one of many great domestic choices.
Sopressata, hot or sweet, depending on your preference. 
Garnish the plate with brightly colored vegetables. We used Campari & Zima Tomatoes.  And we mustn't forget to add some beautiful Italian Flat-Leaf Parsley.

Platter 2 - Formaggi - The Cheeses
Cheeses are pictured above in order, counter clockwise beginning from the bottom left:

Truffle Pecorino - Goodness, this truffley sheep's milk cheese was mouthwatering and worth the price tag. 1/3 Pound means everyone will get a taste, and a 1/2 Pound will allow for a bit extra. 

Taleggio - Relatively easy to find, this Italian "stinky cheese" is brie-like in consistency and wonderful spread on toasty bread or eaten alongside pears or honey. 1/4 to 1/3 of a pound will do. 

Provolone - Loved by all, this kid friendly, salty, and slightly tangy semi-soft cheese is great on any plate. 1/2 of a pound will be just enough for a party of 8, 2 slices a piece most likely.

Goat Cheese Spread- This soft goat cheese can be purchased ready to eat, or you can make it yourself by thinning out regular goat cheese with a teaspoon or two of milk, making it easy to spread on toast. Goat cheese is absolutely delicious with a little drop of

Fig Spread - The sweet and tangy combo of the fig with goat cheese is always a winner.
Grapes - to add color and sweetness. 
Parmesan Straws - again, very kid friendly and great dipped in goat cheese. 
Italian Parsley - for garnish

Forelle Pears - These pears are just gorgeous - petite and green with flecks of peach and red. 

Platter 3 - Cold Salads - Mozzarella Caprese & Marinated Eggplant + Tapenade
Mozzarella Caprese - This is easy! Slice about 3/4 Lb of fresh Mozzarella Cheese and alternate it with slices of the freshest tomato you can find (we used Campari). Drizzle with extra virgin oil and sprinkle with salt and pepper. Drizzle with balsamic vinegar reduction or ready-prepared balsamic glaze. Finally, chiffonade some basil and sprinkle the ribbons over everything. 

Marinated Eggplant - The only item on today's spread that must be made ahead. Choose your favorite method of marinating and prepare a day in advance. Here are two simple recipes (this or this) from our own kitchen. Alternately, good Italian delis will often offer ready-made marinated eggplant. 

Olive Tapenade - Delicious spread onto toast and readily available at most specialty markets. If you can't find tapenade, there are many great recipes available. Save time and buy pitted olives if you end up making it yourself. 


Caprese Salad, Marinated Eggplant, and Olive Tapenade, Photo: NK

Extras:
Slices of Semolina Bread

Carr's Rosemary Crackers, or any variety that suits your taste

Fennel - With its distinct licorice flavor, fennel serves as crunchy and refreshing palate cleanser in between bites. 

And there you have it, plates and plates of delicious Italian specialties that taste as good as they look. 

Is there anything better? 

Wishing you and your families a wonderful holiday season filled with love, laughter and many great meals.

Buon appetito!